Diagram for Drive Belt Craftsman Lawn Tractor: Your Easy Guide to Repair
Is your Craftsman lawn tractor refusing to cooperate? A worn or broken drive belt is a frequent culprit. This guide simplifies understanding your tractor's drive belt diagram, empowering you to tackle repairs yourself. We'll cover everything from identifying the correct belt to replacement, ensuring your mower's smooth operation. Let's get started!
For more detailed diagrams and troubleshooting, check out this helpful resource: Drive Belt Diagrams.
Locating Your Lawn Tractor's Roadmap: The Owner's Manual
First, find your owner's manual. This is your essential guide, containing the drive belt diagram and showing the correct belt routing. If you can't find it, search online for "[Your Craftsman Lawn Tractor Model Number] owner's manual."
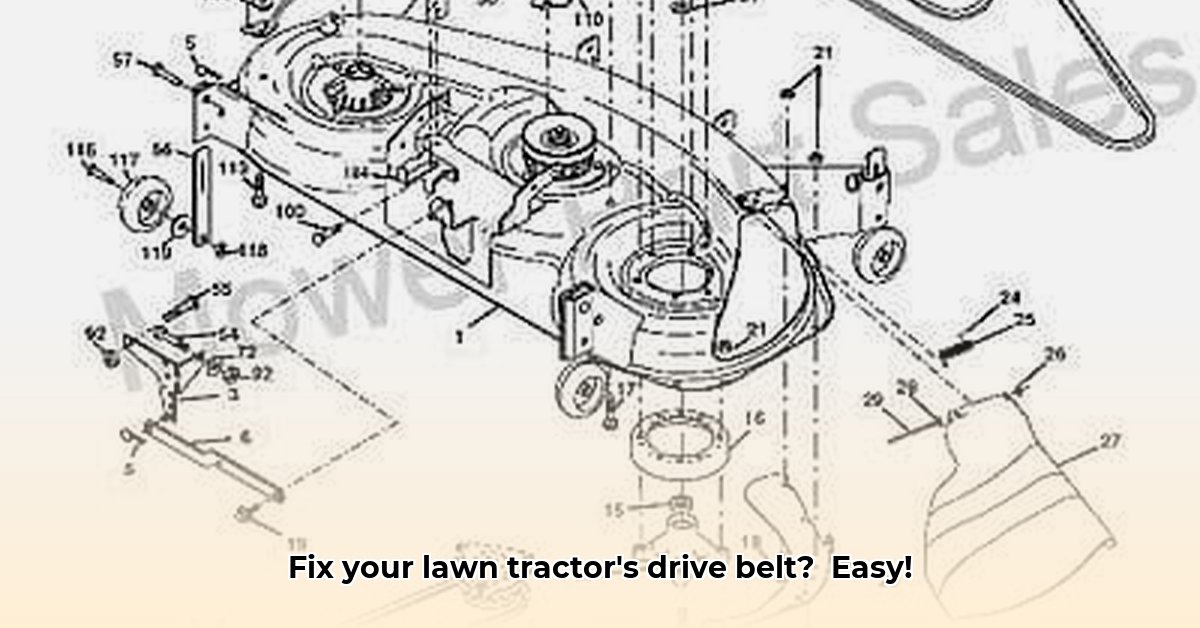
Deciphering the Drive Belt Diagram
The diagram might seem complex initially, but it's a visual roadmap. Here's what to look for:
- Belt Path: The diagram illustrates the belt's route across the pulleys. Follow the line meticulously; it's the belt's path.
- Pulley Identification: Each pulley (engine, blade, transmission) is labeled. This is crucial for proper belt installation.
- Tensioner (If Present): Some models have a tensioner pulley for belt adjustment. The diagram will indicate its location and function.
Correct belt installation is paramount. Improper installation can lead to slippage, damage, and further problems.
Replacing the Drive Belt: A Step-by-Step Process
Safety is paramount!
Step 1: Safety First! Disconnect the spark plug wire and engage the parking brake to prevent accidental starts.
Step 2: Access the Belt: Your diagram shows how to access the belt. You might need to remove the mower deck or other components. Assemble necessary tools beforehand.
Step 3: Remove the Old Belt: Carefully remove the old belt, noting its path for future reference. A picture can be beneficial.
Step 4: Install the New Belt: Carefully install the new belt, following the diagram's path precisely. Take your time; accuracy is key.
Step 5: Tension Adjustment (If Applicable): If your model has a tensioner pulley, adjust it according to the manual or online resources.
Step 6: Test Run: Reconnect the spark plug wire, start the engine, and inspect the blades' operation. Everything should run smoothly and quietly.
Troubleshooting: Addressing Common Issues
Even with careful attention, problems can arise. Here are some common issues and solutions:
- Belt Slipping: A slipping belt might be too loose. Adjust the tensioner (if available) or replace the belt. Consult your diagram!
- Belt Breakage: A broken belt could indicate a more significant problem. Inspect the pulleys for damage. Obstructions in the belt's path should be removed.
Regular maintenance is crucial. Regularly check the belt for cracks, fraying, or other damage to prevent major issues. A worn belt can fail suddenly, leaving you stranded.
Identifying Your Craftsman Model and Finding the Right Diagram
Knowing your Craftsman lawn tractor model is crucial, as diagrams vary by model. Find the model number (usually on a sticker under the seat or on the frame). Search "[Craftsman lawn tractor model number] drive belt diagram" online. Multiple sources may offer different diagrams; compare them for clarity.
Understanding the Drive Belt Diagram: A Visual Guide
The drive belt diagram utilizes color-coding and illustrations to show the belt's path. It's a roadmap for your tractor. Each pulley will be labeled, allowing easy path tracing. Some diagrams provide numbered steps for installation guidance.
Locating and Assessing Your Drive Belt
With the diagram, locate the belt in the engine compartment. Remove covers (consult the manual). Check for cracks, fraying, or glazing – these signal the need for replacement. A worn-out belt impacts performance and can damage other components. Replacing it is a cost-effective preventive measure.
Replacing the Drive Belt (Step-by-Step)
- Preparation: Gather necessary tools: new belt, gloves, wrench (if needed). Consult your manual for specifics.
- Diagram Review: Review the drive belt diagram to confirm the belt's route.
- Belt Removal: Remove the old belt, following the reverse of the diagram's path. You might need to loosen components; your manual will guide you here.
- New Belt Installation: Install the new belt, precisely following the diagram. Verify correct positioning on all pulleys.
- Final Check: Manually rotate the belt to ensure proper fit and path alignment. Double-check against your diagram.
Remember, always consult your Craftsman owner's manual for model-specific instructions.